Follow Me on Pinterest

Instagram

Polka Dot Rosie

Pages

Tuesday, March 25, 2014

Stencils still make little kids happy :)

Hi everyone :) I have awesome friends named Nick and Angie who are so much fun and have a great sense of humor.  They are genuinely good people and I know that every time they need a card, it's going to be a fun challenge. This time was no exception.  One of Nick's closest friends is going through a divorce and it's really hard on her daughter. Being the nice people that they are, they asked me to make a card saying how awesome she is. Nick gave me the words to use and left the creativity up to me.  Here's what I came up with:


I didn't have a stamp for the outside, so I just used my printer.  I wanted to keep the front cute and simple so it didn't take away from the most important part...the inside:  


There is a small mirror inside that I framed with the same stars pattern that is on the front of the card. It reads simply "....YOU!"  The little girl was SO excited to get the card. Her mom sent me a nice email saying how much it was appreciated, so without a doubt, mission accomplished. I was really happy to see that she loved it and that Nick and Angie loved it, too :) 

Here is a list of products that I used for this one:
MPD Graduated Stars Stencil (My Favorite Things)
Tim Holtz Mirrored Sheets
Colorbox Cat's Eye Ink Pad in Chiffon White
Victorian Velvet Distress Ink
Impression Obsession Make Me Happy
Nestabilities 7 Large Classic Square Dies
110 lb.card stock

Thanks so much for stopping by! I hope you enjoyed it :)


Friday, March 21, 2014

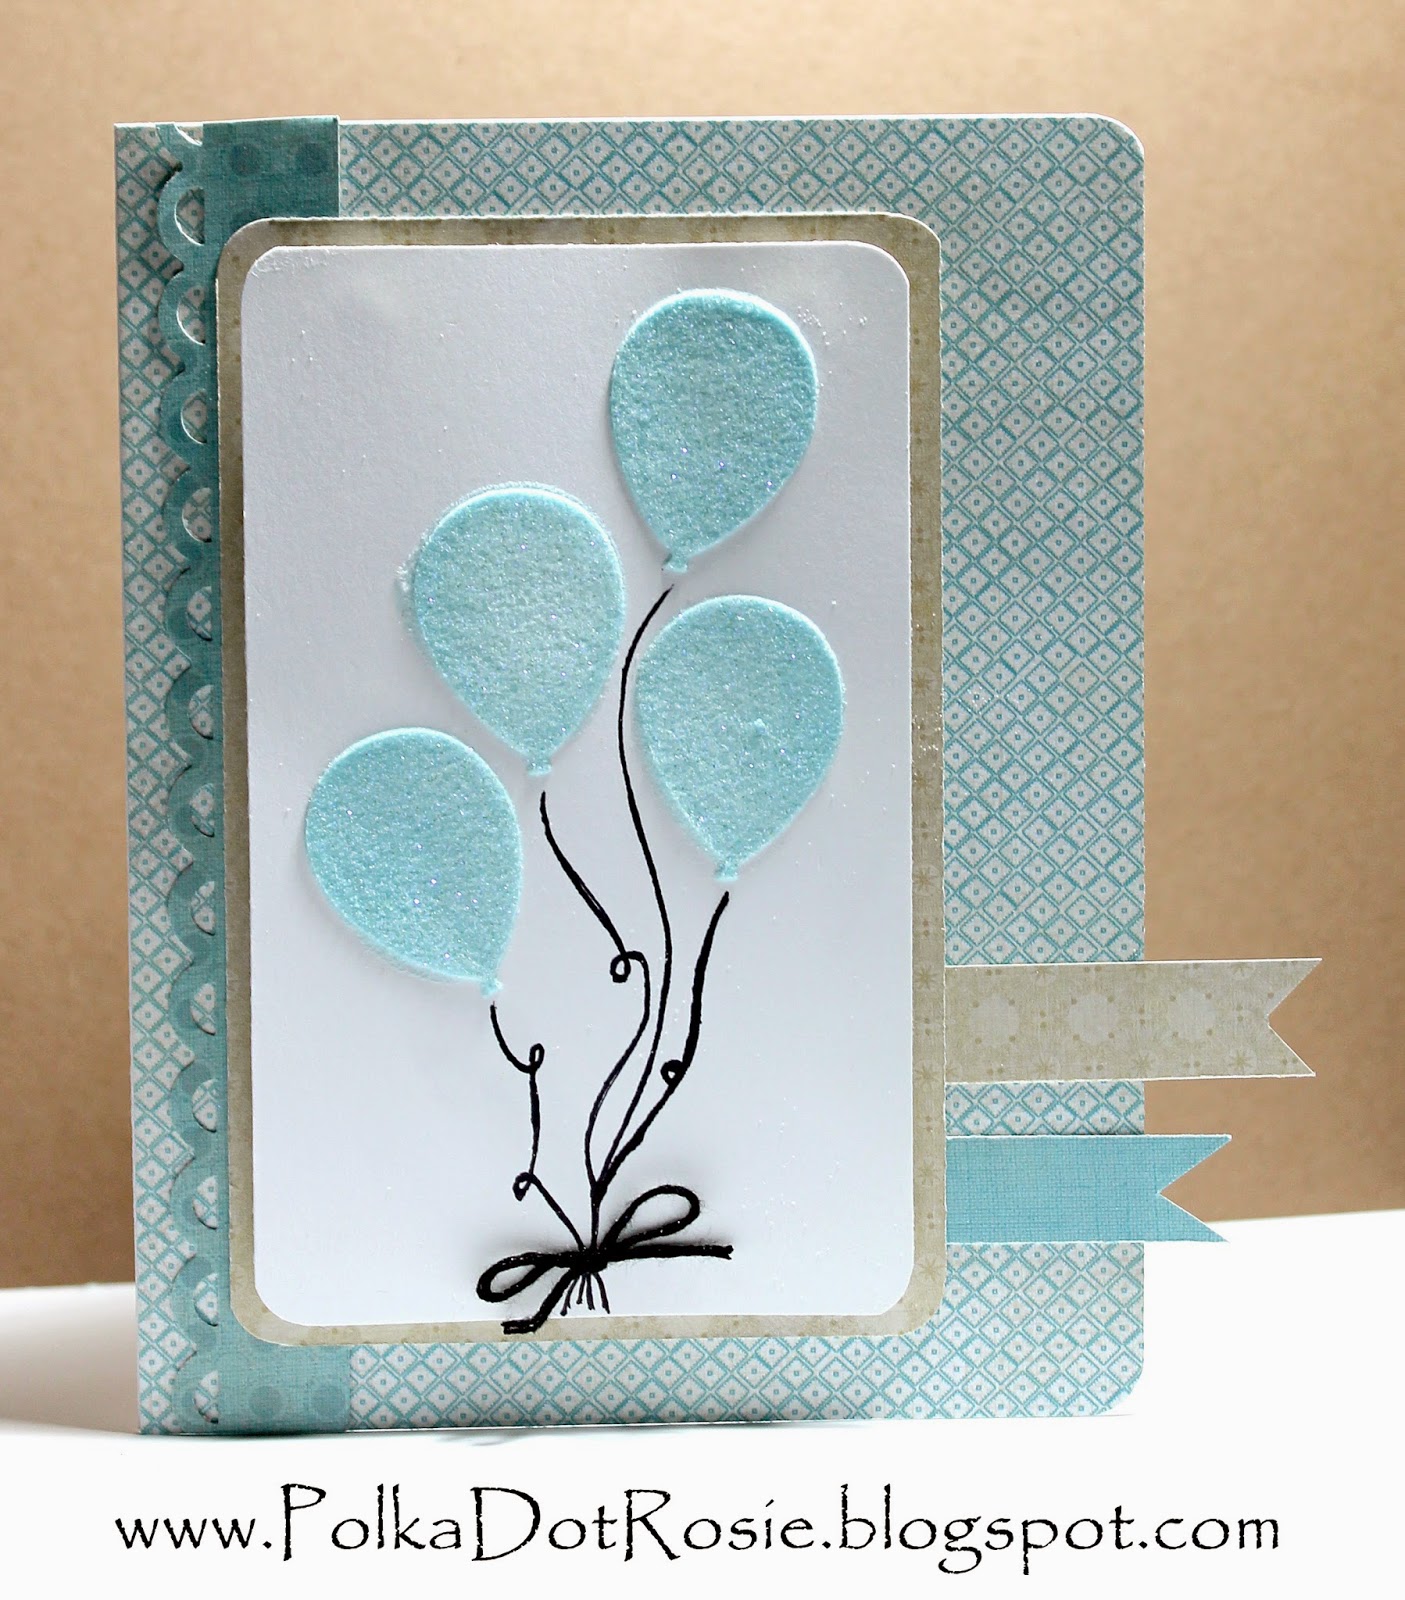
Masculine Birthday Card Using DIY Stencils--PS SPARKS Challenge

Hi there :) I didn't get to submit this card for the Paper Smooches Guest Designer Search like I had intended because some unexpected things popped up and I missed the deadline, so I decided to submit it for their SPARKS challenge instead! Since it is an "Anything Goes" challenge this week, I decided to push myself out of my comfort zone. I always struggle coming up with masculine cards, probably because I am a woman, so I decided to embrace it and challenge myself to try a new technique on a masculine card and the result is darling!  I'm so excited to give this to someone!

One of the techniques I wanted to try was making my own stencils, so I grabbed my balloon dies and went for it! I am so happy with how it turned out! I was initially going for a blue and yellow theme, but I colored the embossing paste myself and after falling in love with this shade, I decided to hold off on the yellow.


After stenciling the balloons, I sprinkled them with glitter embossing powder, then let them dry before using my heating tool.  The balloon strings were drawn on with a black Sharpie and I used black floss for the bow. I don't often make cards have a little something hanging off the side and I don't really know why. I should probably do it more often because I really like the way it looks. I walked into this card challenge with a challenge for myself and I'm really happy with the final outcome :)

Here is a list of supplies that I used:

Paper Smooches Balloon Dies
Sizzix Big Kick
Broken China Distress Ink
Dreamweaver Stencils Embossing Paste
Recollections Glitter Embossing Powder
Heat Tool
Black Fine Point Sharpie Marker
Fiskar's Apron Lace Border Punch
Sew Easy Black Floss
Pop Dots
Indie Chic "Nutmeg" 6x6 Paper Pad
We R Memory Keepers Corner Chomper

Thanks so much for stopping by! I hope you liked it :)


Wednesday, March 19, 2014

Magic Card!! PS April Guest Designer Search #3

Hi there :)  If you've been following me, you know that I have been spending a lot of time working on designs for the Paper Smooches April Guest Designer Search.  There is one more day until the deadline, so I have been cramming to get the last couple finished.  This magic card is my third entry in the search :)

This is the first time I attempted a magic card, and to be completely honest, it gave me a lot of grief. A lot LOL. BUT it turned out really cute and now I know what worked and what didn't work for the next time I make it!  

Here is the idea of the card: it's pure magic! The front is cute, but kind of plain. Nothing too fancy....


Now is when it gets fun!  Look what happens when you pull on the little tab at the top....


How fun is this?!  Kids absolutely love it, but as an adult, I find it pretty cool, too.  Like I said before, it was quite tricky, but I was not going to give up on it. I can be quite tenacious ;)

Here are the list of supplies I used:

Spectrum Stamp Set (Paper Smooches found here)
Copics (RV 10, 13, 14, 17; YG 03, 05, 09; G09; W02, 04)
Spellbinders Dies Lacey Squares
Spellbinders Classic Squares
Transparency
Washi Tape
Assorted cardstock
Memento Tuxedo Black
StazOn
Tombo Mono Aqua Liquid Adhesive

I hope you enjoyed today's card! Thanks for stopping by!


Saturday, March 15, 2014

You are Amazing Rainbow--PS April Guest Designer Search

Hi everyone :) We all could use a little rainbow in our lives, and this one happens to be another submission for Paper Smooches' April Guest Designer Search!  I used PS stamps and dies from my latest shopping craze for this project and had a great time playing around with everything!  It's such a happy card!  Now, I know it's a little dark, but there is a fair amount of detail to the white paper and it wasn't showing up on lighter pictures.  The darker picture showed the glitter, silver embossing and stars best. Enjoy!


The rainbow die is so cool, but it took a little bit of getting used to.  It die cuts all six colors of the rainbow at once and I didn't separate them until after I had cut all the colors I needed, so I ended up having to go through 36 tiny strips of rainbow and comparing sizes at first LOL Lesson learned! It was MUCH easier the second time around and I adore the final outcome. 

I embossed a white piece of paper with stars before using the rainbow die, then put the rainbow colors in the negative space like a puzzle. It was pretty easy to do and the pieces fit together rather nicely. I love sparkle and wanted to add a little more interest to the card, so I covered the clouds in silver Stickles. I didn't want the sentiment and rainbow to compete for attention, so I combined stamps from the Chit Chat stamp set and embossed "You are amazing" on vellum paper. I love how subtle it is...the silver looks so pretty with the silver glitter! Cute and simple! It makes me feel so happy!

Here are the supplies that were used:
Rainbow die (Paper Smooches)
Chit Chat stamp set (Paper Smooches)
Spectrum stamp set (Paper Smooches)
Star Embossing Folder
Versamark
Silver Embossing Powder
Heat Tool
Vellum Paper
Various cardstock
Stickles

Thank you for stopping by! I hope you enjoyed it!

Thursday, March 13, 2014

Owls that Woot! PS April Guest Designer Search

Hi everyone :) Thanks for visiting today! The shopping bug bit me pretty hard recently and thanks to a fantastic anniversary sale at Paper Smooches, I decided to stock up on some things!  I am thrilled with this company's quality of product and excellent customer service. It is well deserving of a stellar review, which I'm working on, but since there is a deadline for their April Guest Designer Search, I'm submitting entries first.

This card was SOOO much fun! I have always been fascinated with owls. They're so beautiful and majestic to me and I was so happy to finally use them on a card.  Although PS has a couple of adorable stamp sets featuring owls, I went ahead and tried out their digital stamps for this project. These little guys have a bit of sass. Check out those expressions! LOL


I have been working on coloring with Copics and really love how everything turned out!  I used them to color the owls and the branch, then embossed the branch with a wood grain embossing folder. I pop dotted the owls, glossed up their eyes and bit, added a fun word bubble, and that is that!  Darling!  Now I just have to find someone to give it to...

Here are the supplies that were used:
Copic markers (V12, 15, 17; YG 01, 05, 09; E 25, 27; YR 16, 18)
Glossy Accents
Wood grain embossing folder
Word Bubbles die (Paper Smooches)
Chit Chat stamp set (Paper Smooches)
Pop Dots
Heavy Cardstock

Thanks so much for stopping by!  I hope this card made you smile :)


Saturday, March 8, 2014

Baby's Birthday Card--NON2

Hi there! I've been really busy this week!  I made a small handful of cards recently and have a few more that need to be finished. They are all so cute and I'm really excited to share them with all of you, but decided to post one at a time so the recipients had a chance to enjoy them :) It's also a new month which means a new challenge for Naughty or Nice Challenges!! Last month's theme was love and I got some good laughs from my naughty submission, but for this month's birthday challenge, I'm going for nice :)

So let's get to it! One of my dearest friends in the world lives across the country and I only get to see her a couple of times a year.  She is coming to town (YAY!!!!) and wanted me to make a couple of cards for her to give to her family, including this one for her godson's his first birthday. I LOVE using this stamp for babies and thought it would be fun if I tried something new with the design of the card. Although it took some practice to get it right, I ended up really liking the final product. Take a look and tell me what you think:


I just love the alternating colors :) 


Isn't it just so cute?!?  I'm so happy with how it turned out!  

I colored the image with colored pencils and used Glossy Accents on the balloon.  I used the Swiss Dot embossing folder on the front of the card, added a little ribbon for interest, and cut the ovals with my Spellbinders dies. The stamp and sentiment are from the same Stampin' Up set, but I am not sure of the name of it. It was a yard sale find :)

Thanks for stopping by! Have a great weekend!